Thursday, May 31, 2012

Playing With Clay (and Leaves)


Some process photos

What do you get when you combine silicon rubber leaf mats with a slump mold and some clay? A serving platter...obviously. And that's just what I made last week. I worked with the interns to roll some slabs and get our hands dirty (with clay).  Now I'm going to tell you the steps on how to make this project, too.

  1. Create a slab about 1/4” thick. Then we cut the shape of the leaf out of the slab and add pressure to transfer the leaf patterns into the clay. Then use a needle tool or your fingers to trim and smooth the edges. Now you have clay leaves!
  2. Next take the a slump mold and slump the leaves into the shape of the mold, overlapping them in places so your platter does not have holes in it.
  3. Score and slip the parts that overlap. Then smooth the creases so that it looks clean.
  4. Then take some plastic and some paper and fill the concave (top) part of the platter in and flip it over so you have access to the part that would normally be sitting on a table.  This helps to keep the slumped shape while working on the bottom side of the platter. Now you can clean up the bottom and reenforce the joints.
  5. All that's left to do is flip it back into the slump mold where you let it dry to leather hard and then plastic wrap it till it is bone dry.

Now I just need to bisque it and glaze it. I'm really excited to see how it will turn out. What glazes do you think I should use?

Tools used:
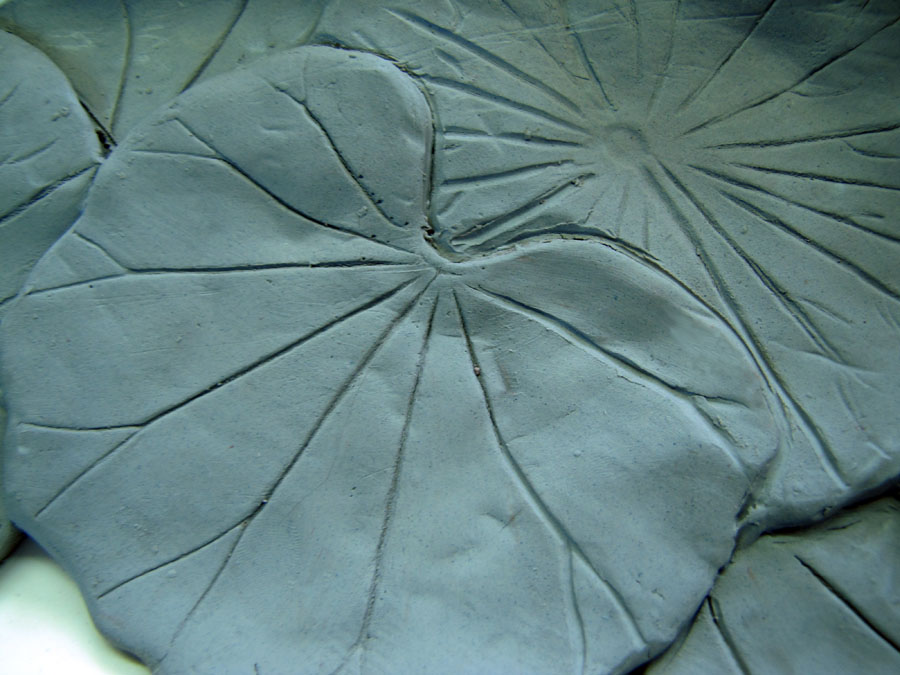
Close up on some of the leaves

Thursday, May 24, 2012

Time With The Interns


Spencer throwing for a demo video.

Today I had a chance to sit down and talk with our interns. Oh, yes! We have interns. Kevin and Spencer have been interning with us during the month of May. Kevin and Spencer have been in the ceramics program at Conestoga High School for four years and mostly focus in throwing functional work. They were recommended to intern at The Ceramic Shop by their teacher to get a better idea of how a business in ceramics might work. Their internship here will help them to better understand the art world and to see if it seems like a plausible career path.
So far, they have found working at The Ceramic Shop to be fun and engaging. I asked the boys what their favorite things where to do here. Spencer has enjoyed working with Tracy on making the HydroBats. He liked learning the process of making products, which is an experience The Ceramic Shop can give to him because we produce so many different items. Kevin has like helping make demonstration videos for our website and YouTube channel. The tool demonstration videos they have been making will be up on our YouTube channel soon!

Spencer and Kevin will be going away to college after they finish their internships with us. Kevin will be attending University of Colorado and Spencer will be going to the University of Ohio. Both Kevin and Spencer will be studying business with a minor in ceramics. They are hoping to maybe start their own businesses or even take their ceramics to the next level. Everyone at The Ceramic Shop wishes them the best. We've really enjoyed having them around.


Kevin centering.

Friday, May 18, 2012

Something New from Skutt


If you were at NCECA this year and managed to stop by the Skutt booth perhaps you saw a demo of their new front loading kilns. No? Well, we were able to see them talk and demo this amazing new kiln. Skutt designed their front loading kiln to have some really cool design features. Thanks to the light weight door and roof AND floor elements the kiln heats and cools more evenly. One of the coolest features has to be that it is designed to fit through a standard doorway. This may not seem like a big deal, but if you've owned another large capacity kiln before and had issues installing or moving your kiln because it didn't fit through the doorway you know how cool this is.

Artist, Tom Turner has been using Skutt's Front Loader to make some amazing work. He's been creating a never before seen combination of Copper Red Oxblood and Lunar Crystal. Lunar Crystal is a crystal glaze that is usually fired in an oxidation atmosphere whereas the Copper Red Oxblood is usually required in a reduction firing. The result is truly amazing. The red of the Copper Red Oxblood is brilliantly red and is complimented well with the light green to white of the Lunar Crystal glaze. To see some of his work visit his site: http://tomturnerporcelain.com/page084.htm
If you would like more information on this kiln give us a call (215-427-9665) or visit the product's description page on our website: http://www.theceramicshop.com/store/product/10738/Skutt-Front-Loader-KM16F-240v/

We are looking forward to seeing more work produced in this amazing kiln.


Thursday, May 03, 2012

Xiem Adds FLEX to Their Family of Tools


We've had a lot of items added to our store the last few weeks and they are all really exciting. One of the things I can not wait to try is some of the new Xiem tools. Xiem makes high quality and brightly colored tools. We have just added some of their new mini rollers for decorating. They have bright turquoise handles and each of the four sets comes with three different rollers. There is also a couple of tools that provide a bit of flexibility to your work. This includes a flexible ruler and something called a potter's wand which is used while throwing. These flexible tools provide the user with the angle or shape they need to get the job done. What I'm excited to try is the new clay cutter. It is designed to be customizable. This means you can change out the wire to alter not only the length but the kind of wire. For me that's really cool because the long wire cutters never really cut it for me, if you know what I mean. With this tool it's easy to change out the wire and it even comes with three interchangeable wires.  One is a straight wire cutter and the other two are spring wires to provide texture while cutting! How cool is that? A hex key is included so you don't even have to go looking for one that fits. And I don't know about you but I love tools that come with their own... tools.


Friday, April 20, 2012

Posting about Posts


So last week I learned how we make Hydro-Bats and this week I went on another learning adventure! This week I spent some time with Duc, the man in charge of our post production. Oh, didn't I tell you? We make a lot of products at The Ceramic Shop and one of the things we make is posts for furniture kits. Duc is a BFA student at Tyler School of Art, and like a lot of the employees at The Ceramic Shop is studying ceramics. He has been working at The Ceramic Shop for about 3 months but he already has making posts down to an art (no puns intended).

Our selection of posts

We use a custom mix of clay to make the posts. This clay helps make the posts durable even after many firings. Duc portions the clay and extrudes it with a pug mill. The most difficult part of making posts is to make sure they dry without warping. If there is one thing anyone who has played with clay experiences it is that clay tends to warp while it drys. Duc takes extra care to keep the posts as straight as possible. He flips them multiple times so that all sides receive exposure to the air. It takes almost an entire week for the post to fully dry!

Extruded posts that are slowly drying.

The posts are fired in a single firing. When then are cool, Duc uses a wet saw to cut them precisely to the right size. We make 11 different sizes reaching up to 10” in height. This allows you to utilize your entire kiln, right down to the half inch (we make half inch posts).

Well, it's been another fun week at The Ceramic Shop. Hope you guys have been productive!  If you'd like to check out our posts please visit our website.

Pieces of left over posts after they're cut with a wet saw.

Thursday, April 12, 2012

An Afternoon with Hydro-Bats


I spent the afternoon with Tracy, where I learned about her process in making the Hydro-Bats.  I knew already that Mark invented the Hydro-Bat while he was still teaching at University of Pennsylvania.  Most of the history of the Hydro-Bats can be found on our website if you are interested in reading about it.  Tracy has been making the Hydro-Bats for about 7 months now, so she's very skilled in the process.

Piles of Hydro-Stone
Mark used to make the Hydro-Bats himself, but today I was learning how they are made in the present.  First, Tracy mixes the Hydro-Stone with water.  She mixes 60 lbs of Hydro-Stone at one time!  Don't worry, the mixing is not done by hand!  Tracy uses an electric mixer to get the job done.  This allows the Hydro-Stone to mix properly and to its fullest potential. 

Then she pours the Hydro-Stone into the various molds we have.  It's a lot like pouring plaster, and in fact Hydro-Stone is very similar to plaster.  The difference?  Hydro-Stone is stronger than ordinary plaster which gives our finished product a longer life.  People as us all the time what types of tools can be used with Hydro-Stone.  Although stronger than ordinary plaster, we still recommend you use wood, rubber or plastic tools on Hydro-Bats.  It will help procure a longer life and a more even working surface.

  After the Hydro-Stone is mostly set she takes them out of the mold and trims them up to look pretty.  The tops of the Hydro-Bats are so smooth that it's hard to not touch them.  They are finally set out to finish the drying and hardening process.  Then they are shipped off to our suppliers or put in our store. 
Trimmed and ready to go!

I really enjoy working in a place that still makes some of it's products and learning about how Hydro-Bats are made was fun.

Drying Hydro-Bats

Friday, April 06, 2012

Conventional Recovery


How is everyone holding up? Did NCECA wear you down? We are still recovering from all the excitement ourselves. It was a lot of fun to see all of our suppliers and a lot of you in person! What was your favorite thing to do at NCECA? We spent a lot of time behind our own booth but managed to sneak away to watch some demonstrations and photograph some pieces.

NCECA has many different programs and I hope you all took advantage of all you could. One amazing goal of NCECA is show off a lot of artists from all ages and levels. They have various competitions including an Emerging Artist program for undergraduate or freshly graduated college students, a general ceramic artists competition, a K-12 exhibit, and  much more. We managed to get some photographs from the K-12 exhibit:


We were really excited to see some of the new tools coming in the following months from Mudtools and X-tools. They are going to be awesome and will be put on our website as soon as they are available so make sure to check back with us!

Skutt also has some new mind-boggling kiln technology that they relieved to their NCECA onlookers. We will be getting this exciting new product in our store and on our website just as soon as Skutt will let us. For now, we will just have to wait.

Well, we have a lot of photos and videos we have to sift through and will be posting them slowly over the next month so make sure to check back for new highlights from NCECA 2012! You can also check out our Facebook. Like us and check out our albums!

-Melissa